Gingerbread Zombies (Lactose free!)
Welcome back to another lactose free recipe. This week I wanted to share with you something that is more on the creepy side. These deliciously spiced cookies are perfect for Halloween or simply any day you want to do something a little bit spookier.
You will need a very specific cookie cutter to achieve the same design that I did.
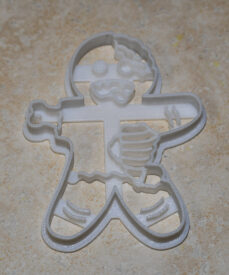 I purchased my cookie cutter from a website called 'bakerlogy'. I have been a long time customer of theirs and have found that the quality of these cutters are superb. You may be able to find the same design on other websites like eBay or amazon depending on where you are located.
The recipes on this website have been tested with lactose free ingredients multiple times to ensure their success and deliciousness . As always, this recipe is lactose free providing you use the right ingredients. Always make sure your ingredients are safe.
I purchased my cookie cutter from a website called 'bakerlogy'. I have been a long time customer of theirs and have found that the quality of these cutters are superb. You may be able to find the same design on other websites like eBay or amazon depending on where you are located.
The recipes on this website have been tested with lactose free ingredients multiple times to ensure their success and deliciousness . As always, this recipe is lactose free providing you use the right ingredients. Always make sure your ingredients are safe.
Servings:
1
yield(s)
Prep Time:
90
mins
Cook Time:
10
mins
Total Time:
100
mins
Ingredients
- Zombie cookie cutter (from bakerlogy)
- 125 g Lactose free margarine (Brand used - Nuttellex)
- 1/2 cup Brown sugar
- 1/2 cup Golden syrup
- 1 Egg yolk
- 2 & 1/2 cup Plain flour
- 1 & 1/2 tbsp Ground ginger (if you want a very slight ginger taste use 1tbs instead)
- 1 tsp Mixed spice
- 1 tsp Bicarb soda
- Small bowl of extra flour (it needs to be big enough to dip the entire cookie cutter in the flour )
- Rolling pin
- 2 Baking trays
- Sieve
- Bowls
- Skewer or small sharp knife
Instructions
- In a medium bowl add the sugar and margarine. Beat well until the mixture becomes pale and creamy.
- In a separate bowl add the flour, ginger, mixed spice and bicarb soda. Mix well.
- Add the egg yolk and golden syrup to the margarine mixture.
- Mix well until smooth.
- Grab the flour mixture and the sieve.
- Sift half of the flour mixture into the margarine mixture. Mix well.
- Sift the remaining half of the flour mixture into the margarine mixture. Mix until it starts to come together.
- Tip the dough out onto a lightly floured work surface.
- Knead until smooth and form the dough into a ball.
- Tightly wrap the dough in clingwrap and place in the fridge for an hour to harden and set. You can leave it in the fridge overnight if you need to.
- Preheat your oven to 180°C and line two trays with baking paper. Lightly flour your work surface and rolling pin. Cut the dough in half. Wrap one half in the cling wrap and set aside.
- Roll the dough out to 1/2 a cm in thickness. Dip your cookie cutter into the bowl of flour to coat all the grooves and surfaces. Tap the excess off gently. Press the cookie cutter down onto the dough. Press in to make sure the dough has the imprint. Do not press in all the way. I find that if you do this the dough is very hard to get out of the cookie cutter.
- Keep cutting out more shapes.
- Gently remove the excess dough. The edges will be jagged.
- Now grab your knife or skewer and clean up around the zombie.
- Place the zombie onto the baking tray.
- Keep cutting, cleaning, and placing all the zombies on the baking tray. Make sure to leave a gap in between them.
- Gather all the leftover dough and knead until smooth again. Continue the process until you use up all the dough including the half that is placed to the side.
- When a baking tray has been filled with zombie cookies place the tray in the preheated oven and bake for 10 minutes or until lightly browned.
- Place the cookies onto a cooling rack.
- Set aside until cooled. You can decorate if you wish, I chose to leave mine plain.
- Serve devour and enjoy.